 iCalamus > Reference > Inspectors > Color inspector
Indeks
[Ten rozdział nie został jeszcze przetłumaczony.]
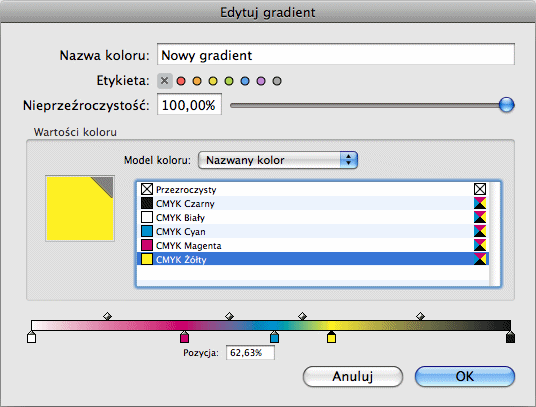
When talking about 'Gradients' in iCalamus, we think about gradients like you can see in the following dialog. Thus, a gradient is no single color, but a gradient of at least two blended colors. In the list of available colors, gradients are visualized with a tiny preview image which shows the blend. So you can separate them from each other and from simple list colors.
You define gradients in this dialog. You can name the gradient and define the opacity.

Each new gradient in iCalamus will start with the blended colors white (left) and black (right) and can be changed without limitations.

If you want to change a blend color, click into the relevant tiny position mover below the gradient preview bar. It defines the position of the blend color. Now you can choose a color model for this color and adjust the color itself. The changed color for the clicked position will then be shown in the large preview area. When a gradient contains more than two colors, you can move the inner color positions to suit your needs with the mouse.

The blend from one color to the next color can be adjusted. Click above the preview bar into the relevant position mover. You can then move its position with the mouse or enter values in a range from 10% to 90% in the relevant edit field.

Add more colors to the gradient by clicking in the desired position below the preview bar. A new blend color will be added there immediately and can be adjusted afterwards.
If you want to remove a blend color, simply drag its position mover away from the preview bar. It will then disappear.

This is how a gradient may look like — but you can add many more colors, for sure.